You know you definitely need to try something out when your dishwasher suddenly stops functioning properly.
If you have been looking forward to entering diagnostic mode on your kitchenaid dishwasher, we’ll walk you through the details on how to do this in the article below.
Briefly: To activate the diagnostic mode, you are required to press any 3 buttons in the following sequence (1-2-3, 1-2-3, 1-2-3) three times.
Keep on reading for more extensive explanation and tips!
Diagnostic Mode can be regarded as a simple test mode and it’s a feature available on most appliances which allows it to reset and test the appliance functionalities.
A simple diagnosis is all your dishwasher needs to get back to work. Let’s dive into the step-by-step procedures to do this!
How To Enter Kitchenaid Dishwasher Diagnostic Mode?
Knowing how to enter kitchenaid dishwasher test mode saves you a lot of time and unnecessary technician charges.
Follow the steps below in order to initiate the diagnostic mode.
Step 1: Put the dishwasher in standby mode
Before initiating this procedure, ensure that the appliance is turned on and not currently running on any cycles, which is likely not to if it’s malfunctioning.
Step 2: Press the required keys in a sequence
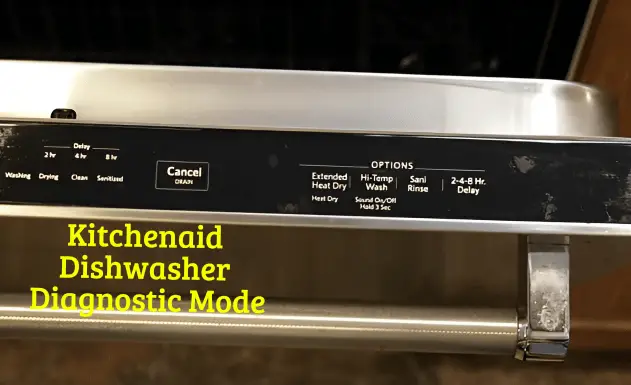
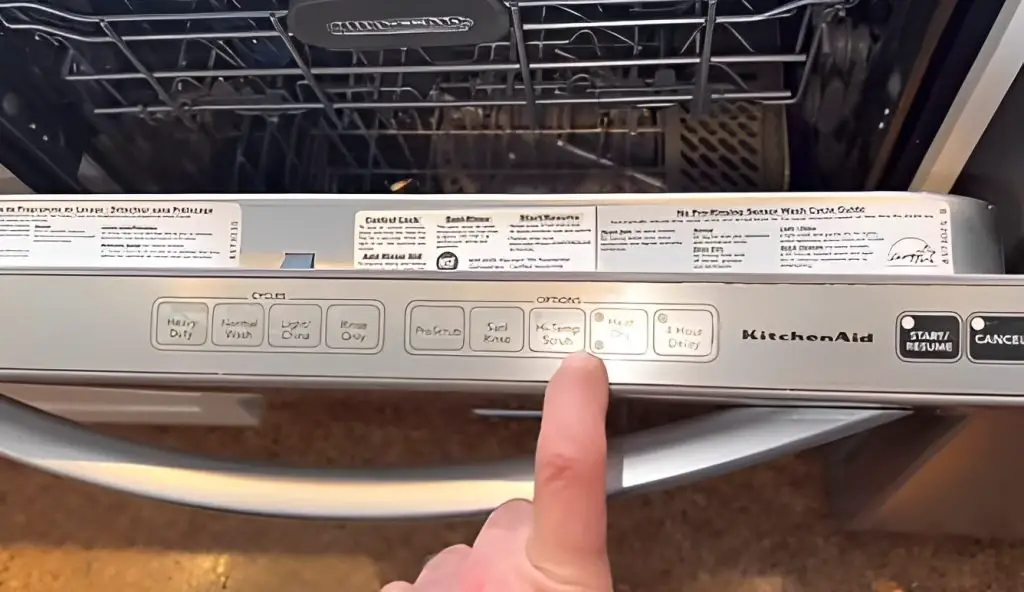
Take a closer look at the interface control board of the dishwasher, you will notice that there are different buttons on the display which are used for controlling functions and cycles on the dishwasher.
Press “Heat Dry“, “Hi-Temp Wash” and “Semi Rinse” buttons consecutively three times.
What this means is that you need to click on those keys in the (1-2-3, 1-2-3, 1-2-3 sequence) and make sure you don’t leave more than 1 second between each click.
Step 3: Close the door latch
To be sure that you are on the right path, all button LEDs will get illuminated once you’ve correctly implemented the key sequences.
The next step is to close the door immediately after the LEDs are all displayed. Kitchenaid dishwasher diagnostic mode will be initiated after this.
While the door is closed and the diagnostics is ongoing, you can use the “Start/Resume” key as an interval advance key which is used to skip sensor checks.
Step 4: Read the flashing error code
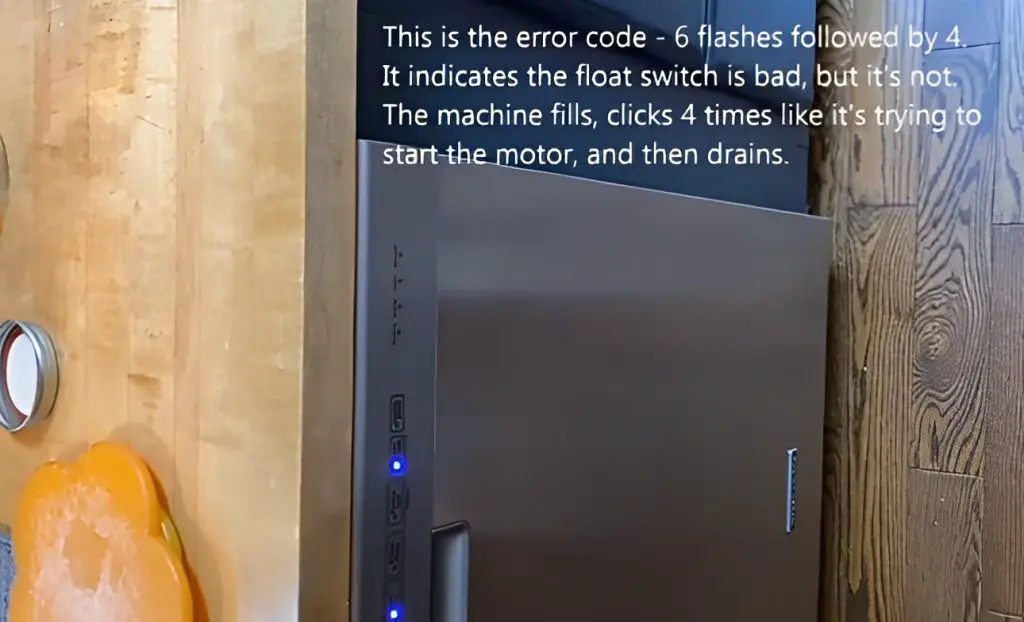
The “Clean LED” or a small white LED will begin to flash in two parts during the service diagnostic cycle. You need to pay attention to this light in order to discover the error code and detect the issue with your dishwasher.
For instance, if the Clean LED flashes 8 times then pauses for two seconds, followed by another 4 flashes. This action indicates an 8-4 or F8 E4 error code which means your dishwasher is experiencing a stuck float switch problem.
The Clean LED will do this repeatedly three times unless you skip or advance the process using the start key like I’ve stated above.
Nevertheless, that’s the step-by-step procedures on how to enter the diagnostic mode on your Kitchenaid Dishwasher.
Doing this will clear all the previous information and status from the memory of your dishwasher.
How To Exit Diagnostic Mode On Kitchenaid Dishwasher?
If you are willing to exit the diagnostic mode on your dishwasher, it only requires a simple step. All you need to do is press the “Cancel’ button.
The button can be located on all Kitchenaid Dishwasher types irrespective of the models. Just press the “Cancel” key and the service mode will be canceled.
Kitchenaid Dishwasher Diagnostic Codes: how to read
After activating the diagnostic mode, error codes will be highlighted and you need to be able to read them in order to fix your dishwasher.
Previously mentioned above in the article, we gave an example of how to read the F8 E4 error code. In this section we’ll be highlighting some other error codes and what they mean.
| Diagnostic Codes | Their Meaning |
| 1-1 or F1E1 error code | Electronic control board and wiring harness issues. |
| 1-2 or F1E2 error code | Electronic control boards are damaged or corrupted. |
| 2-1 or F2E1 error code | Stuck button on the user interface control |
| 2-2 or F2 E2 error Code | User interface control can’t communicate with electronic control board |
| 3-3 or F3 E3 error code | Failure at the drain hose check valve as dirty water to backflow into the dishwasher. |
| 5-1 or F5E1 error code | Door switch failure |
| 6-3 or F6E3 error code | Suds or air are in the water pump |
Now that you are aware of a huge list of kitchenaid dishwasher error codes and their meaning. You should definitely be able to detect whatever is wrong with your dishwasher via diagnostic mode
Note: If you don’t find your specific error code in the chart above, check out our site and see if you’d find the error codes meaning or use a search engine.
Frequently Asked Questions
Q: How to enter kitchenaid kdte404dss0 diagnostic mode
In order to activate the test mode on this particular model, you need to put the appliance in standby mode and press any three keys in the following sequences.
(1-2-3, 1-2-3, 1-2-3 sequences) Ensure that there is no more than 1 second interval between the key presses.
The diagnostic mode will be initiated as all LEDs turn on.
Q: kitchenaid dishwasher kdtm404kps troubleshooting
One way to troubleshoot a kitchenaid kdtm404kps dishwasher is to reset and activate the diagnostics.
To reset the appliance, unplug it from its power source. In a bid to activate the diagnostics, you are required to press any 3 buttons in the following sequence (1-2-3, 1-2-3, 1-2-3).
Q: kitchenaid dishwasher kdfe104dss0 troubleshooting
For this particular dishwasher model, all you need to do in order to troubleshoot and enter the diagnostic mode is to carry out the procedures below.
Press “Heat Dry”, “Hi-Temp Wash” and “Semi Rinse” buttons consecutively three times. You need to click on those keys in the (1-2-3, 1-2-3, 1-2-3 sequence) and make sure you don’t leave more than 1 seconds interval between each clicks
Q: kitchenaid dishwasher kdpe234gps0 troubleshooting
Different models might have discrete location of keys and buttons.
In order to activate the test mode on this specific model, you need to put the appliance in standby mode and press any three keys in the following sequences.
(1-2-3, 1-2-3, 1-2-3 sequences) Ensure that there is no more than 1 second interval between the key presses.
The diagnostic mode will be initiated as all LEDs turn on, then you need to pay attention to the error codes.
Closing Remark
Moving forward, entering the kitchenaid dishwasher test mode may seem like a tricky task, but it’s actually quite simple with the right instructions.
We hope that with the above step-by-step procedures, you should be able to fix any issues you are currently experiencing with your Kitchenaid Dishwasher.
Related contents: